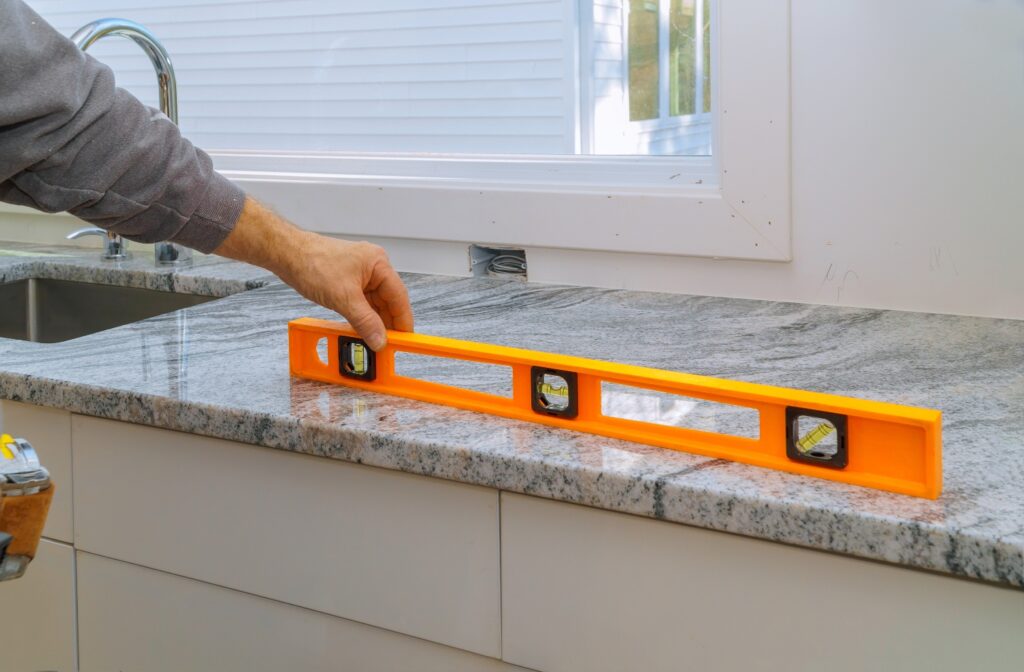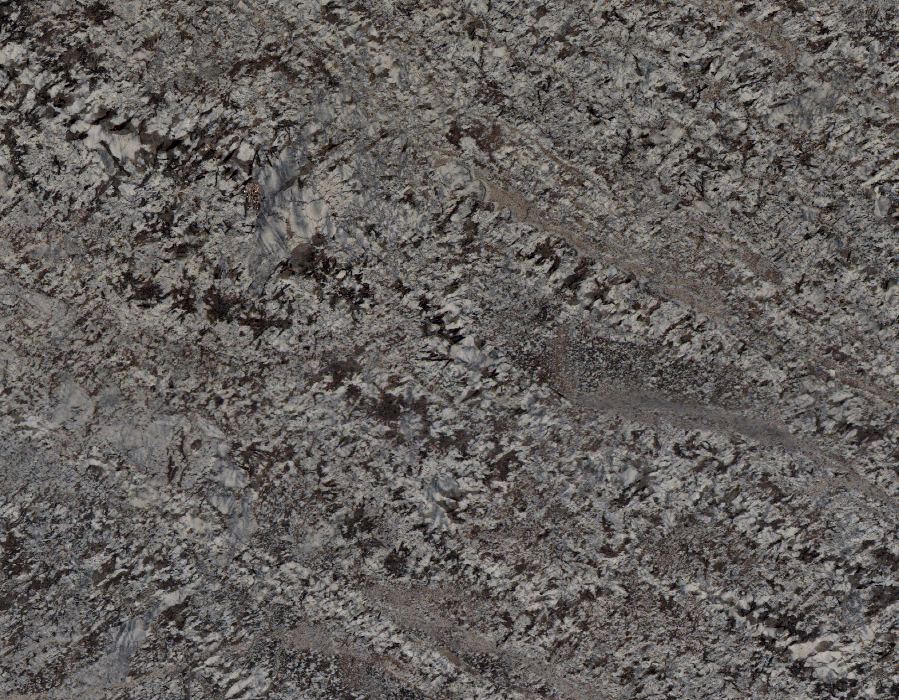
What Happens If You Don’t Seal Your Granite Countertops? A Time-Lapse Experiment

Modern Kitchen with White Cabinets, Black granite & Gold Accents

What Happens If You Don’t Seal Your Granite Countertops? A Time-Lapse Experiment
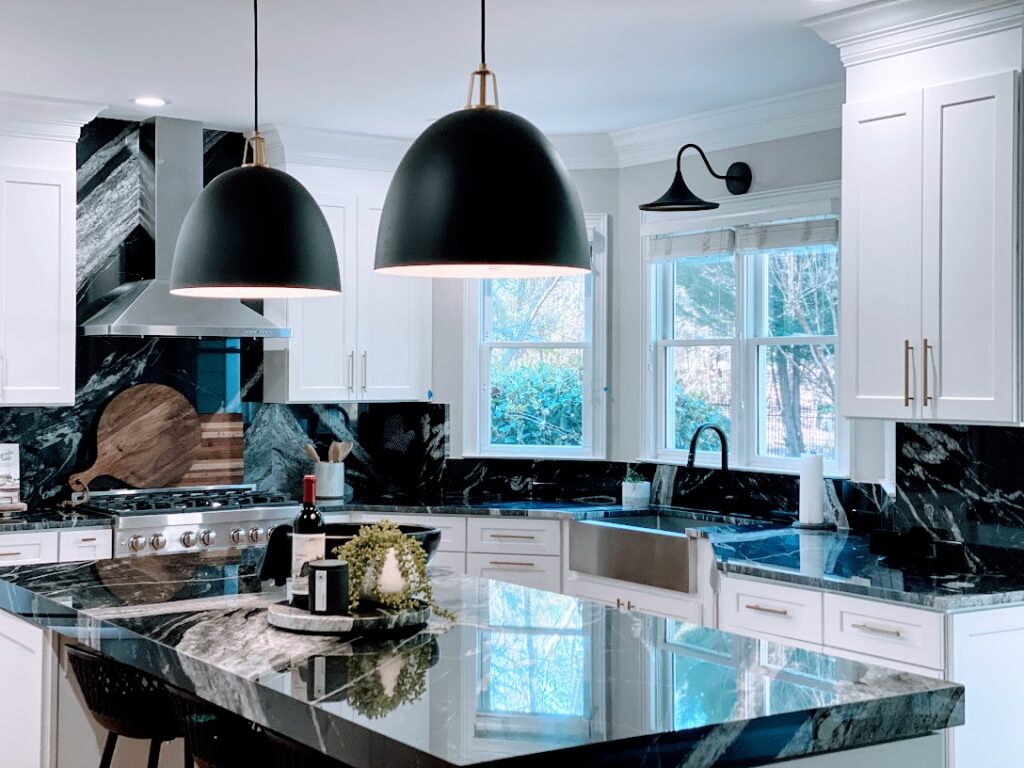
Luxury Kitchen with White Cabinets, Black granite & Gold Accents

Granite countertops transform ordinary kitchens into extraordinary spaces with their unique patterns and natural beauty. Many homeowners invest in these stunning surfaces without fully understanding the maintenance requirements necessary to preserve their appearance and functionality. Sealing stands out as the most misunderstood yet vital procedure among these crucial maintenance tasks.

Have you ever wondered what actually happens when granite surfaces remain unsealed? Would visible damage occur immediately, or might the deterioration process unfold gradually over time? To answer these questions definitively, Atlanta Stone Creations conducted a controlled time-lapse experiment documenting common household substances’ effects on sealed and unsealed granite samples.

The results proved both surprising and educational, offering valuable insights for anyone considering granite installation or maintaining stone surfaces in their home. This comprehensive guide examines our findings while providing practical advice for protecting your valuable stone investments.


Understanding Granite Porosity: The Science Behind Sealing

Before exploring our experiment results, grasping fundamental stone properties helps clarify why sealing becomes necessary in the first place. Despite its seemingly impenetrable appearance, granite contains microscopic pores—tiny openings invisible to the naked eye but large enough to absorb liquids under certain conditions.

Different granite varieties exhibit varying porosity levels based on mineral composition and formation processes. Though exceptions certainly exist, lighter-colored stones typically feature more porous structures than darker varieties. This natural characteristic explains why identical maintenance routines might produce different outcomes across granite types.

Sealing products work by filling these microscopic pores with protective compounds that repel potential contaminants without changing the stone’s appearance. Think of sealant as an invisible shield rather than a surface coating—it penetrates the stone rather than merely sitting atop it.


The Time-Lapse Experiment: Methodology and Setup

Our experiment utilized six identical granite samples representing popular varieties found in modern kitchens. Three samples received professional-grade sealer application according to manufacturer specifications, while three remained unsealed. Each sample underwent exposure to common household substances known for their staining potential:

  • Red wine
  • Olive oil
  • Coffee
  • Lemon juice (acidic)
  • Tomato sauce
  • Water (as control)

These substances remained on each surface for identical periods—15 minutes, 1 hour, 4 hours, and 24 hours—with thorough documentation occurring at each interval. Standard cleaning procedures followed each exposure period to assess stain persistence and penetration depth.

High-resolution photography captured visible changes, while specialized equipment measured absorption rates and surface integrity throughout the testing period. This methodical approach ensured reliable, reproducible results applicable to real-world scenarios.


Dramatic Revelations: Week One Results

Differences between sealed and unsealed samples manifested almost immediately with certain substances. Within the first week, several notable patterns emerged:

Liquid Absorption Rates

Unsealed samples displayed significantly higher absorption rates across all test substances. Red wine created visible darkening on unsealed granite within just 15 minutes, while sealed samples showed no perceptible change even after extended exposure. Similar patterns appeared with coffee, though the timeline extended slightly longer.

Water beaded attractively atop sealed surfaces yet gradually penetrated unsealed samples, demonstrating how even seemingly harmless substances can eventually access the stone’s internal structure without proper protection.

Acidic Reaction Evidence

Lemon juice produced particularly troubling results on unsealed samples. After just one hour of contact, this acidic substance created subtle etching—permanent damage that dulled the stone’s natural polish and altered surface texture. No amount of cleaning removed these marks, as they represented actual chemical reactions with minerals in the granite rather than simple staining.

Sealed samples, by contrast, resisted such etching completely, maintaining their original luster even after 24-hour exposure periods. This dramatic contrast highlights how sealing protects against both staining and chemical damage.

Oil Penetration Patterns

Olive oil created perhaps the most visually dramatic consequences. This common cooking ingredient penetrated unsealed surfaces deeply, creating dark patches that expanded outward from the application site. These oil-based stains proved particularly stubborn during cleaning attempts, requiring specialized poultice treatments for removal.

Would these stains eventually fade naturally? Our continued observations revealed that without intervention, oil marks on unsealed granite actually darkened over time rather than improving, creating permanent discoloration that significantly detracted from the stone’s aesthetic appeal.


Long-Term Consequences: Month One Observations

As our experiment continued, new concerns emerged regarding the unsealed samples:

Cumulative Effect Documentation

Repeated exposures to the test substances produced increasingly dramatic results. Areas previously exposed to staining agents became more vulnerable to subsequent spills, suggesting that initial contaminants altered the stone’s structure to facilitate further absorption.

This cumulative effect resembles in real kitchens, where countertops encounter multiple potential contaminants during normal use. Each exposure potentially compromises the stone’s resistance to future staining incidents without sealing protection.

Surface Texture Alterations

After just one month, unsealed samples displayed noticeable texture differences compared to their sealed counterparts. The once-smooth surface developed subtly rough areas where acidic substances had contacted the stone. At the same time, oil-exposed sections exhibited a different texture change characterized by an almost sticky quality that attracted dust and debris.

Touch tests revealed these differences clearly—fingers glided smoothly across sealed samples yet caught slightly on unsealed sections. This tactile difference indicates structural changes occurring within the stone matrix itself.

Color Fading Measurement

Perhaps most surprisingly, unsealed samples began showing measurable color fading in areas repeatedly exposed to cleaning products. This unexpected finding suggests that even routine maintenance procedures might gradually degrade granite’s aesthetic qualities without sealant protection over time.

Sealed samples maintained consistent coloration throughout the testing period, with specialized measurement equipment detecting no significant changes despite identical cleaning routines.


The Six-Month Verdict: Conclusive Evidence

By the experiment’s conclusion, differences between sealed and unsealed samples had become dramatic enough that even casual observers could immediately identify which pieces had received protective treatment:

Stain Catalog Development

Our team documented over twenty distinct stains across the unsealed samples, ranging from faint discoloration to deep, permanent marks that significantly altered the stone’s appearance. These stains created a comprehensive catalog demonstrating how unsealed granite can deteriorate under normal household conditions.

Sealed samples, having undergone identical exposure conditions, showed remarkably few lasting effects—just two faint marks where highly pigmented substances had remained in contact for extended periods, both of which responded well to standard cleaning procedures.

Shine Comparison Analysis

Specialized reflectivity measurements revealed that unsealed samples lost approximately 28% of their original luster over the six months, while sealed specimens maintained 96% of their initial shine. This quantifiable difference translated to visibly duller surfaces lacking dimensional depth and light-reflecting qualities that make granite so appealing.

Bacterial Growth Assessment

Though not originally part of our testing protocol, microscopic examination revealed an unexpected finding: unsealed samples harbored significantly higher bacterial counts than their sealed counterparts after identical exposure to organic substances. This discovery suggests sealing may provide hygienic benefits beyond mere stain protection—an essential consideration for kitchen surfaces where food preparation occurs.


Practical Applications: Protecting Your Investment

Our experiment provides clear evidence supporting regular granite sealing, but what does this mean for homeowners? Several practical recommendations emerge from these findings:

Optimal Sealing Frequency Determination

How often should granite countertops receive fresh sealant application? Our results suggest this depends primarily on three factors:

  1. Stone variety characteristics: Lighter, more porous granites may require sealing every 6-12 months, while denser, darker varieties might maintain protection for 2-3 years.
  2. Usage patterns consideration: Countertops experiencing heavy cooking activity benefit from more frequent sealing than less-used surfaces.
  3. Simple water test evaluation: Place a few drops of water on your granite. If the water beads up, existing sealant remains effective. If water slowly darkens the stone, resealing should occur soon.


Effective Sealing Techniques

Proper sealing involves more than simply wiping product across stone surfaces. Our experience suggests following these steps for optimal results:

  1. Thorough cleaning preparation: Remove all surface contaminants with appropriate stone-safe cleaners before sealing.
  2. Complete surface drying: Allow at least 24 hours drying time after cleaning to ensure no moisture remains trapped within the stone.
  3. Even application methods: Apply sealant with inconsistent, overlapping strokes rather than random patterns.
  4. Appropriate dwell time: Allow sealant to penetrate according to manufacturer specifications—typically 15-30 minutes—before buffing away excess product.
  5. Multiple coat advantages: For maximum protection, consider applying two thin coats rather than one heavy application.


Between-Sealing Maintenance Recommendations

Even properly sealed granite benefits from appropriate daily care. These practices extend sealant effectiveness while maintaining stone beauty:

  1. Prompt spill response: Wipe up liquids quickly, even from sealed surfaces, particularly acidic substances like citrus juice, vinegar, or wine.
  2. Appropriate cleaning agents: Use pH-neutral cleaners specifically formulated for natural stone rather than all-purpose products containing harsh chemicals.
  3. Heat protection practices: While granite resists heat admirably, sudden temperature changes can potentially damage both stone and sealant. Using trivets under extremely hot items represents prudent protection.
  4. Cutting board utilization: Despite granite’s hardness, cutting directly on the surface dulls knives and potentially compromises sealant integrity. Cutting boards provide practical protection.


Addressing Common Sealing Misconceptions

Our experiment also helps clarify several persistent myths regarding granite maintenance:

“Sealing Makes Granite Completely Stain-Proof”

Sealed granite resists staining dramatically better than unsealed stone, but no surface remains completely impervious to all potential contaminants. Highly pigmented substances left for extended periods can eventually penetrate even well-sealed granite. Protection means increased resistance, not absolute immunity.

“Dark Granite Doesn’t Need Sealing”

While generally less porous than lighter varieties, dark granite still benefits from appropriate sealing. Our experiment included both light and dark samples, with unsealed dark granite still showing significant staining compared to its sealed counterpart, though developing problems less quickly than lighter examples.

“Sealing Creates an Artificial Appearance”

Quality sealants penetrate stone rather than creating surface films, preserving granite’s natural beauty while adding protection. None of our sealed samples exhibited artificial shine or altered appearance when properly applied.

“Once Sealed, Granite Stays Protected Permanently”

Sealant effectiveness diminishes over time through normal wear and cleaning processes. Our testing shows protection gradually decreases rather than suddenly failing, making regular water drop testing important for monitoring protection levels.


Conclusion: The Compelling Case for Sealing

Our time-lapse experiment provides unequivocal evidence supporting regular granite sealing as essential maintenance rather than an optional luxury. The dramatic differences between sealed and unsealed samples demonstrate how this simple preventative measure preserves both the aesthetic beauty and functional integrity of these significant home investments.

Would completely neglecting to seal truly ruin granite countertops immediately? No—deterioration occurs gradually rather than catastrophically. However, our documentation clearly shows how quickly unsealed stone accumulates subtle damage, culminating in significant appearance and performance issues.

How much easier is preventing such damage than attempting restoration afterward? Considerably. Despite professional restoration attempts, many stains that developed in our unsealed samples proved permanent, while identical spills on sealed specimens were wiped away effortlessly.

Atlanta Stone Creations offers comprehensive sealing services using premium products specifically formulated for lasting protection. Our technicians apply these products using techniques refined through years of experience, ensuring optimal results for every stone variety.

Remember that each granite slab possesses unique characteristics requiring individualized care. Questions about your specific countertops? Contact our stone care specialists for customized maintenance recommendations tailored to your particular installation.


DIY vs. Professional Granite Installation: Is It Worth the Risk?

DIY vs. Professional Granite Installation: Is It Worth the Risk?

Granite countertops represent a significant investment in your home’s value and aesthetic appeal. Many homeowners face a crucial decision when planning their kitchen or bathroom renovation: should they attempt to install granite countertops themselves or hire experienced professionals? This choice carries substantial implications for project outcomes, budget considerations, and long-term satisfaction.

Have you considered tackling granite installation as a weekend project? Watching online tutorials has made the process seem straightforward. Before making this important decision, understanding the complete picture—including hidden challenges, required expertise, and potential pitfalls—becomes essential for any prudent homeowner.

Atlanta Stone Creations has witnessed numerous renovation scenarios throughout our years serving the greater Atlanta area. Our extensive experience provides unique insights into both successful projects and unfortunate renovation disasters. This comprehensive guide examines the true costs, benefits, and risks associated with DIY versus professional granite installation.


Understanding the Granite Installation Process

Installing granite countertops involves multiple complex stages that require precision, specialized tools, and technical knowledge. Familiarizing yourself with the complete process helps establish realistic expectations before evaluating DIY feasibility.

The typical installation journey includes the following:

  1. Accurate measurement and templating: Creating precise templates that account for all edges, corners, angles, and cutouts.
  2. Material selection and procurement: Sourcing appropriate granite slabs that match your design vision while ensuring sufficient quantity and quality.
  3. Fabrication: Cutting, shaping, and finishing the stone according to measurements, including specialized edge treatments and fixture accommodations.
  4. Transportation: Moving hefty, fragile slabs safely from the fabrication location to the installation site.
  5. Structural preparation: Ensuring proper support systems to bear substantial weight loads.
  6. Installation and seaming: Placing, leveling, and connecting multiple pieces with nearly invisible joints.
  7. Sealing and finishing: Applying appropriate sealants for protection and longevity.

Each phase demands specific technical knowledge, proper equipment, and experienced handling to achieve professional results. Does this comprehensive process align with your current skill set and available resources?


The DIY Approach: Potential Benefits

Why do some homeowners consider DIY granite installation? Several motivating factors drive this consideration:

Cost Savings Potential

Financial considerations often top the list of reasons homeowners contemplate DIY installation. Professional services typically include labor costs, overhead expenses, profit margins, and sometimes markup on materials. Eliminating these components can theoretically reduce project expenditures by 15-30%, depending on market conditions and project complexity.

Many budget-conscious renovators find this prospect extremely appealing, especially when managing overall project costs.

Personal Satisfaction

Completing challenging home improvement projects delivers significant psychological benefits. The sense of accomplishment from successfully installing your own granite countertops can enhance your enjoyment of the finished space. Many DIY enthusiasts value the learning experience and skills development associated with complex renovation tasks.

“Nothing compares to the pride I feel showing off my kitchen and telling guests I installed everything myself,” shares Michael R., a dedicated DIY homeowner. “Though I must admit, granite installation tested my limits more than any previous project.”

Schedule Flexibility

Professional installation teams operate according to their availability, which might not align perfectly with your preferred timeline. DIY installation allows complete scheduling control, potentially accelerating project completion or allowing work during unconventional hours that suit your personal schedule.

Weekend warriors particularly appreciate this flexibility, enabling project progress without disrupting normal weekday activities or requiring time off work.


The DIY Approach: Risks and Challenges

Despite potential advantages, DIY granite installation presents numerous significant risks that merit careful consideration:

Specialized Tools Requirement

Professional granite installers utilize numerous specialized tools that most homeowners don’t possess, including:

  • Diamond-blade wet saws for precision cutting  
  • Polishing machines for edge finishing  
  • Seam-setting equipment for joining slabs  
  • Transport A-frames and suction-cup lifting systems  
  • Sink cutout templates and tools  

Purchasing or renting these items significantly impacts your projected cost savings. Many DIY attempts fail because proper equipment proves either unavailable or prohibitively expensive for one-time use.

Physical Hazards

Working with granite creates serious safety concerns for inexperienced handlers:

  • Extreme weight: Standard granite slabs weigh approximately 18-20 pounds per square foot. A typical kitchen countertop section may exceed 200 pounds, requiring multiple people for safe handling.
  • Silica dust exposure: Cutting granite releases hazardous silica particles that can cause serious respiratory issues without proper ventilation and safety equipment.
  • Injury risks: The combination of heavy materials, sharp edges, and potentially awkward installation angles creates numerous opportunities for serious physical injuries.

Quality and Precision Issues

Granite installation tolerates minimal error margins. Common DIY mistakes include:

  • Improper measurements: Even slight miscalculations can render expensive granite slabs unusable or create unsightly gaps.
  • Uneven surfaces: Failing to establish perfectly level support structures results in unstable or cracked countertops.
  • Visible seams: Professional fabricators create nearly invisible connections between slabs—a technical skill that typically requires years to master.
  • Edge imperfections: Achieving smooth, consistent edge profiles demands specialized equipment and extensive experience.

These issues often remain undetectable until installation completion, at which point remediation options become limited and expensive.

Warranty Considerations

Most granite suppliers offer material warranties that become void with improper installation. Similarly, many home insurance policies exclude coverage for damages resulting from DIY structural modifications. This potential warranty limitation creates significant financial exposure should problems arise in the future.

The True Cost Calculation

When evaluating potential savings, consider these frequently overlooked DIY expenses:

  • Tool acquisition/rental costs
  • Additional materials for potential mistakes
  • Safety equipment
  • Transportation rental for large slabs
  • Lost time value (hours spent on installation)
  • Potential professional correction costs

Many homeowners discover that projected savings evaporate when accounting for these hidden expenses. Even more concerning, failed DIY attempts often necessitate professional intervention, potentially resulting in higher overall project costs than initially hiring experts.


Professional Installation: Comprehensive Benefits

Contracting experienced granite installers delivers numerous advantages beyond mere convenience:

Technical Expertise and Precision

Professional installers bring years of specialized experience to your project. This expertise manifests in multiple ways:

  • Accurate measurements: Professionals utilize advanced templating techniques that account for wall irregularities, corner specifications, and appliance fitment.
  • Proper substrate preparation: Experts ensure adequate structural support that prevents future cracking or sagging.
  • Seamless connections: Technical knowledge enables nearly invisible joins between multiple granite pieces.
  • Perfect edge finishing: Specialized equipment creates consistently smooth, attractive edges that enhance overall aesthetic appeal.

This precision significantly impacts both the immediate appearance and long-term functionality of your granite surfaces.

Comprehensive Equipment Utilization

Professional installation teams arrive with all necessary specialized tools and equipment. Their investment in proper machinery ensures precise cuts, appropriate polishing, and safe handling throughout the installation process.

Time Efficiency

Professional teams typically complete complex granite installations in a fraction of the time required by DIY attempts. What might need an entire weekend (or longer) for inexperienced homeowners often takes professionals just a few hours to execute flawlessly.

This efficiency minimizes disruption to your household routine and accelerates project completion timelines, allowing you to enjoy your renovated space faster.

Material Optimization

Experienced fabricators excel at maximizing material usage, potentially reducing waste and associated costs. Their expertise in slab layout and cutting sequence often allows for more efficient utilization of expensive granite materials.

Insurance and Warranty Protection

Reputable professional installers provide comprehensive warranties covering both materials and workmanship. These guarantees offer valuable protection against potential issues, creating significant peace of mind for homeowners.

Additionally, established companies maintain appropriate insurance coverage, protecting you from liability should accidents occur during installation.


Making an Informed Decision: Key Considerations

When evaluating DIY versus professional granite installation for your specific situation, consider these critical factors:

Project Complexity Assessment

Smaller, simpler projects with straight edges and minimal cutouts present lower DIY difficulty levels. Conversely, complex layouts featuring multiple seams, irregular shapes, or numerous cutouts dramatically increase technical challenges. Honestly evaluate your project’s complexity against your skill level.

Have you successfully completed similar home improvement projects? Previous experience with tile work, cabinetry, or other precision tasks provides valuable foundation, though granite installation presents unique challenges even for experienced DIYers.

Budget Reality Check

Calculate comprehensive costs for both scenarios, including all tools, materials, potential mistakes, and time valuation. Rather than focusing exclusively on immediate savings, consider the long-term value and potential resale implications of installation quality.

Many homeowners discover that professional installation delivers superior value despite higher initial investment, particularly when accounting for potential DIY complications.

Timeline Constraints

Does your renovation schedule allow flexibility for potential DIY learning curves and mistakes? Professional installation provides predictable timeframes with minimal disruption, while DIY approaches often extend well beyond anticipated completion dates.

Risk Tolerance Evaluation

Your comfort with potential challenges significantly impacts satisfaction with either approach. Some homeowners enjoy problem-solving and accept imperfection risks as part of the learning experience. Others prefer guaranteed results without unexpected complications.

Skill and Physical Capability Assessment

Granite installation demands considerable physical strength, technical precision, and problem-solving abilities. Honestly evaluate your capabilities against these requirements before committing to DIY installation.


Professional Selection: Finding Quality Installers

If professional installation seems appropriate for your situation, these guidelines help identify reputable service providers:

Credential Verification

Seek companies with:

  • Appropriate licensing for your jurisdiction
  • Comprehensive insurance coverage
  • Industry certifications or association memberships
  • Manufacturer partnerships or authorized installer status

These credentials indicate a commitment to professional standards and ongoing education.

Portfolio Examination

Review completed projects similar to your planned installation. Quality installers proudly showcase their work and provide references from satisfied customers. Before-and-after photographs offer valuable insight into workmanship standards.

Process Transparency

Reputable professionals clearly explain their complete installation process, from initial measurement through final sealing. They willingly answer technical questions and provide detailed written quotes specifying all included services.

Warranty Evaluation

Compare warranty terms between potential providers. Quality installers stand behind their work with comprehensive guarantees covering materials and workmanship for extended periods. These warranties provide valuable protection for your significant investment.


Conclusion: Balancing Risk and Reward

The decision between DIY and professional granite installation ultimately involves balancing numerous factors specific to your situation. While potential cost savings attract many homeowners to DIY approaches, the technical complexity, specialized equipment requirements, and significant risk factors often make professional installation the more prudent.

Most industry experts recommend professional installation for granite countertops, particularly for kitchens and primary living areas where quality and longevity are paramount. The precision, efficiency, and warranty protection experienced installers provide typically justify their associated costs.

Extensive research, proper equipment acquisition, and realistic timeline expectations become essential for those determined to pursue DIY installation despite potential challenges. Consider beginning with smaller, less visible projects to develop relevant skills before attempting main living area installations.

Whatever approach you choose, thorough preparation and an honest assessment of your capabilities will maximize your chances of success and ensure your granite countertops provide decades of beautiful, functional service in your home.

Atlanta Stone Creations offers comprehensive consultation services to help evaluate your specific project requirements. Our experienced team provides transparent guidance regarding installation options, ensuring you make informed decisions aligned with your renovation goals and budget parameters.

Have additional questions about granite installation? Contact our expert team for personalized advice regarding your specific project requirements.

Granite Myths Debunked: What You Need to Know Before Buying

Granite-Lennon

Granite Myths Debunked: What You Need to Know Before Buying

Granite-Lennon

Considering granite for your home renovation? You’re not alone. Countless homeowners face a barrage of conflicting information when researching this popular stone option. As experts at Atlanta Stone Creations with decades of experience, we’ve encountered numerous misconceptions that often confuse potential buyers.

Have you ever wondered if those granite “facts” you’ve heard are actually true? Many prevalent myths about granite countertops continue to circulate throughout home improvement circles, potentially influencing your purchasing decisions. Understanding the reality behind these misconceptions could save you money and prevent unnecessary worry.

Let’s explore some common granite myths and reveal the stone-cold truth behind this remarkable natural material.


Myth #1: Granite Requires Excessive Maintenance

“Granite demands constant upkeep!” This statement represents the most persistent falsehood in the stone industry. Contrary to popular belief, granite countertops need minimal maintenance compared to many alternative surfaces.

The reality? Most granite surfaces require only routine cleaning with mild soap and water. Applying a quality sealer once annually typically provides sufficient protection against stains and moisture. This simple process takes approximately 20 minutes per year—hardly qualifying as burdensome maintenance.

A client recently expressed her surprise after switching from laminate to granite. “I expected to spend more time caring for my new countertops, but they’ve actually been less fussy than my old surface,” she remarked during a follow-up consultation.


Myth #2: All Granite Slabs Are Nearly Identical

Would it surprise you to learn that no two granite slabs share exactly identical patterns? Nature creates unique compositions within each stone formation, resulting in variations that distinguish every piece.

Granite forms through volcanic processes spanning millions of years, producing distinctive characteristics in each slab. Colors range dramatically from midnight black to silvery white, with countless speckles, veins, and mineral deposits creating one-of-a-kind appearances.

When selecting granite, exploring various options becomes essential. Customers frequently express amazement at the diversity available during showroom visits. The selection process often becomes an exciting journey of discovery rather than a simple purchase decision.


Myth #3: Granite Always Harbors Dangerous Bacteria

Worried about bacteria flourishing on your granite surfaces? This concern stems from outdated information that modern science has thoroughly refuted.

Properly sealed granite presents an inhospitable environment for bacterial growth. Its non-porous sealed surface prevents microorganisms from penetrating and multiplying within the material. Studies conducted by reputable research institutions have consistently shown that granite, when maintained with basic cleaning practices, ranks among the most hygienic countertop options available.

Have you considered how granite compares to other surfaces in this regard? Cutting boards, dish sponges, and even cell phones typically harbor significantly more bacteria than clean granite countertops.


Myth #4: Granite Emits Harmful Radiation

Perhaps you’ve encountered alarming claims about granite releasing dangerous radiation? This myth gained traction years ago but lacks substantial scientific merit.

While granite contains trace amounts of naturally occurring radioactive minerals, the emissions measure far below levels that could affect human health. The granite in your kitchen releases less radiation than many everyday items such as bananas, Brazil nuts, or even the natural background radiation present in most environments.

Environmental health experts consistently affirm that granite countertops pose virtually no radiation risk to households. The minuscule amounts detected fall well below regulatory thresholds established by health authorities.


Myth #5: Granite Easily Cracks and Chips

“Granite breaks easily!” This startling claim contradicts the material’s fundamental properties. Measuring between 6 and 7 on the Mohs hardness scale, granite ranks among the most durable natural stones available for residential use.

Standing the test of time, granite monuments and structures have survived centuries of exposure to extreme weather conditions. The material’s remarkable durability explains why it remains a preferred choice for high-traffic areas in homes and commercial spaces alike.

Could granite potentially chip? Yes, any natural stone might sustain damage from severe impacts with heavy, sharp objects. However, normal household activities rarely cause significant harm to granite surfaces. Most professionals can easily repair minor chips should they occur.


Myth #6: Sealing Granite Is Complicated and Costly

Many homeowners delay purchasing granite because they believe sealing requires professional expertise and significant expense. Nothing could be further from the truth.

Applying sealer typically involves wiping the product across the surface, allowing it to penetrate for approximately 15 minutes, then buffing away excess material with a clean cloth. Most high-quality sealers cost between $20-$50 and provide protection lasting 3-5 years, depending on usage and stone characteristics.

Even those with minimal DIY experience can successfully complete this simple maintenance task. The process requires no specialized equipment or technical knowledge—just a clean surface and a few minutes of your time.


Myth #7: Granite Has Fallen Out of Style

Has granite really become outdated as some design blogs suggest? Market research consistently indicates otherwise. While design preferences naturally evolve, granite continues to rank among the top-selling countertop materials year after year.

What changes instead are the specific granite colors and patterns that homeowners prefer. Dramatic patterns might dominate certain years, while subtle tones become fashionable during others. The remarkable variety available ensures granite remains relevant regardless of shifting design trends.

A recent survey of real estate professionals revealed that granite countertops still positively influence home appraisals and buyer interest. Many potential purchasers specifically search for properties featuring natural stone surfaces.


Myth #8: All Granite Products Carry Similar Quality

Would purchasing granite from any supplier yield identical results? Unfortunately, many consumers discover significant quality differences only after installation.

Several factors affect granite quality, including:

  • Extraction methods
  • Cutting precision
  • Thickness consistency
  • Seam alignment
  • Edge fabrication
  • Installation expertise

Reputable suppliers provide detailed information about their sourcing practices and fabrication standards. Examining past projects and customer testimonials offers valuable insight into a company’s workmanship and service quality.

At Atlanta Stone Creations, we’ve helped numerous clients who initially received substandard installations from less experienced providers. The difference in appearance and longevity between properly and poorly installed granite proves immediately apparent to most observers.


Final Thoughts

Ready to make an informed decision about granite for your home? Understanding these common misconceptions provides valuable perspective when evaluating your options. Granite offers exceptional durability, aesthetic appeal, and value—attributes that explain its enduring popularity among homeowners and designers alike.

Are you curious about seeing various granite options in person? Visit our Atlanta showroom, where experienced specialists can answer specific questions about your project requirements. Our extensive selection showcases the remarkable diversity available in modern granite products.

Remember that investing in quality materials and professional installation typically yields superior long-term results. When properly selected and maintained, granite countertops often last decades while maintaining their original beauty and functionality.

What granite myths have you encountered during your research? We’d love to hear about your experiences and provide additional clarification about this remarkable natural stone.

How to Install Quartz Countertops – A Step-by-Step Guide

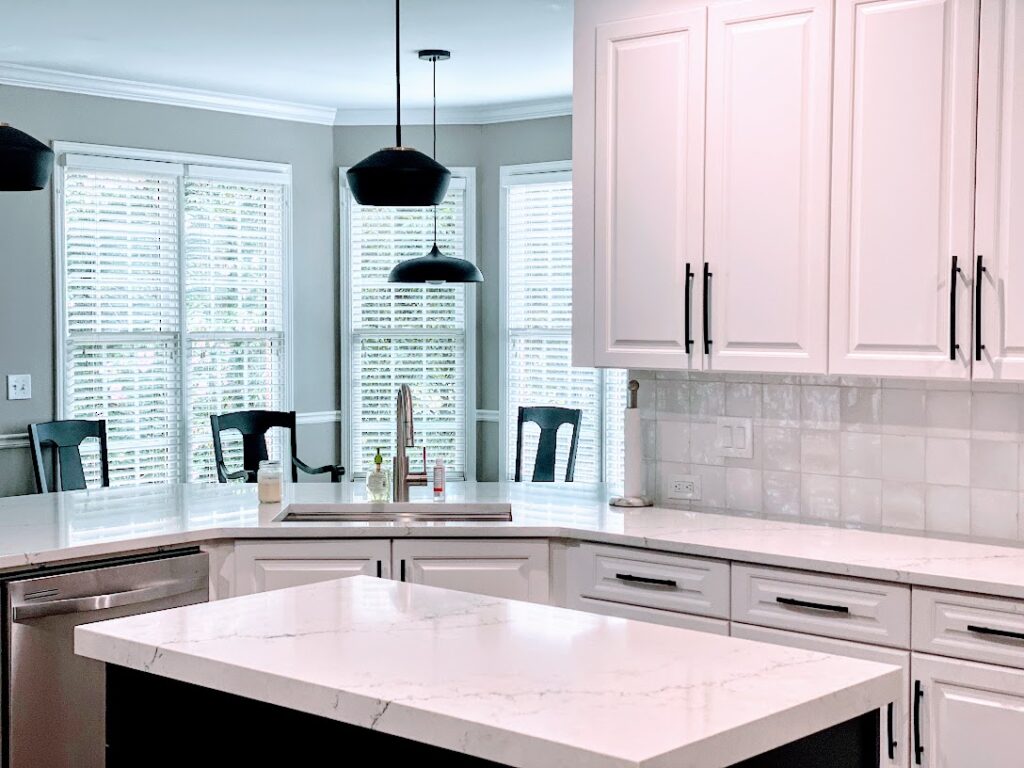
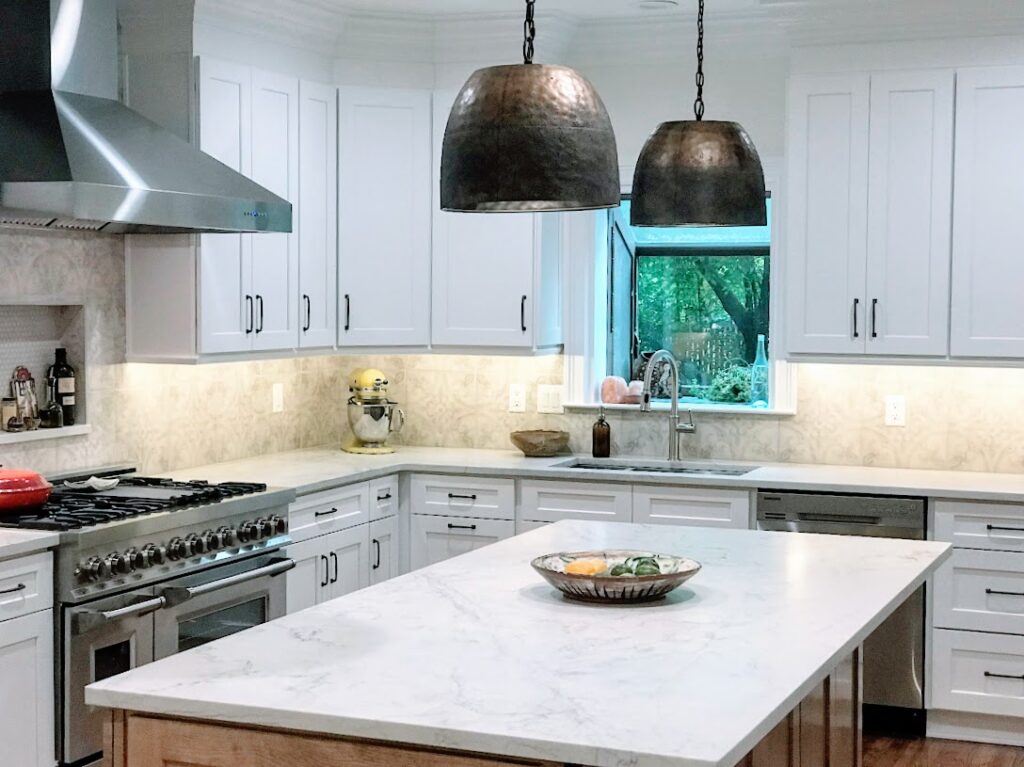
Modern Kitchen with White Shaker Cabinets & quartz Countertops

How to Install Quartz Countertops – A Step-by-Step Guide

Modern Kitchen with White Shaker Cabinets & quartz Countertops

Quartz countertops have become popular for homeowners due to their durability, elegant appearance, and low maintenance requirements. Whether upgrading a kitchen or designing a new space, installing quartz countertops requires precision and attention to detail. This guide provides a comprehensive installation process overview, ensuring a successful outcome.


Preparing for Installation

Proper preparation is essential before beginning the installation. Start by measuring the counter space accurately, ensuring the dimensions align with the planned design. Quartz slabs are heavy, so having a clear path for moving materials is necessary. It’s also crucial to verify that cabinets are level and structurally sound, as they must support the weight of the quartz without shifting over time. Additionally, determine whether any reinforcements are required to support the added weight, particularly for larger spans of quartz.

Step 1: Gather Necessary Tools and Materials

To complete the installation efficiently, ensure that the following tools and materials are available:

  • Measuring tape
  • Level
  • Adhesive (silicone or epoxy)
  • Clamps
  • Circular saw with a diamond blade
  • Safety gear (gloves, goggles, dust mask)
  • Caulk and a caulk gun
  • Painter’s tape
  • Shims (if needed for adjustments)
  • Screwdrivers and fasteners
  • Soft cloths for cleanup
  • Utility knife
  • Sandpaper (for edge smoothing)

Having everything prepared in advance helps streamline the process and prevents delays. Selecting high-quality adhesives and cutting tools is particularly important to achieve a professional finish and avoid chipping.

Step 2: Remove Existing Countertops

If replacing an old countertop, carefully remove it by unscrewing fasteners and disconnecting plumbing fixtures. Take care to avoid damaging cabinets or walls during removal. Once the surface is cleared, clean the area thoroughly to remove dust and debris, ensuring a smooth base for the new quartz slab. Some countertops, such as granite or laminate, may require additional effort for removal. In some cases, professional assistance is advisable to prevent damage to the existing cabinetry.

Step 3: Dry-Fit the Quartz Countertop

Before applying adhesive, position the quartz slab on the cabinets to confirmthe proper fit. If adjustments are needed, mark the necessary cuts with painter’s tape and use a circular saw with a diamond blade for precision. Double-check the alignment, ensuring the countertop sits flush with the walls and edges.

If there are multiple slabs, align the seams correctly and check for potential gaps. Using a plywood template can help visualize placement and minimize errors before making permanent modifications.

Step 4: Secure the Countertop with Adhesive

Apply a bead of silicone adhesive along the top of the cabinet framework. Gently lower the quartz slab into place, pressing down evenly to secure it. Use clamps to hold the countertop steady while the adhesive sets. Allow sufficient time for curing, usually 24 hours, before proceeding with further steps.

Using the correct type of adhesive for quartz installation is essential, as some products may not provide the necessary bonding strength. A specialized stone adhesive is preferable for ensuring a lasting hold.

Step 5: Seam Alignment and Finishing

For installations requiring multiple slabs, seam placement is key. Align seams carefully and apply adhesive along the joint. Use seam-setting clamps to create a tight bond, minimizing visibility. Once dry, buff the seams to achieve a smooth finish.

To enhance the seamless look, colored epoxy can be used to match the quartz material. Sanding the joint lightly after curing ensures an even, polished finish. Keeping the surface free of dust and debris during this stage is critical.

Step 6: Install the Backsplash

A backsplash enhances the overall look while protecting walls from moisture and spills. Apply adhesive to the back of the quartz pieces and press them firmly against the wall. Secure with painter’s tape until fully set.

If the backsplash needs to be cut to fit electrical outlets or other fixtures, mark the cutouts carefully before making adjustments. A wet saw with a diamond blade is ideal for precise cuts.

Step 7: Reinstall Plumbing and Fixtures

Once the countertop is securely in place, reinstall the sink, faucet, and any necessary plumbing connections. Apply caulk around sink edges to prevent water seepage. Double-check all fixtures to ensure they are properly sealed.

For under-mount sinks, ensure proper adhesion between the sink and the quartz. Using clamps to hold the sink in place while the adhesive cures will help maintain a strong bond. Once reconnected, always check for leaks.

Step 8: Final Touches and Cleanup

Wipe down the surface with a mild cleaner to remove any adhesive residue. Inspect the installation for any gaps or imperfections, applying additional caulk as needed. Allow everything to set completely before using the countertop for daily tasks. Avoid placing heavy objects on the surface during curing to prevent shifting.

Using a high-quality quartz polish can enhance the natural shine and provide additional protection against stains. To keep the countertop in optimal condition, be sure to follow the manufacturer’s care instructions.


Cost Considerations and Maintenance Tips

Installing quartz countertops involves material costs, fabrication, and labor expenses. Pricing varies based on thickness, edge design, and custom cutouts.  

Maintaining quartz surfaces is relatively simple. Clean with a gentle soap and water solution, avoiding harsh chemicals that could dull the finish. Cutting boards, hot pads, and trivets can help prevent damage from excessive heat and sharp objects. While quartz is highly resistant to scratches and stains, regular maintenance will extend its lifespan.


Common Mistakes to Avoid

While quartz countertop installation is a manageable project, mistakes can lead to costly errors. Here are a few common pitfalls and how to avoid them:

  1. Incorrect Measurements – Always double-check measurements before making cuts. Small miscalculations can result in poorly fitting slabs.
  2. Using the Wrong Adhesive – Not all adhesives work with quartz. Ensure that the product is designed for stone surfaces to prevent future detachment.
  3. Neglecting Seam Placement – Poorly placed seams can disrupt the appearance of the counter. Carefully plan and align them for the best results.
  4. Failing to Support Heavy Slabs – Large quartz slabs require sufficient support. Reinforce cabinets if necessary to prevent sagging or breakage over time.
  5. Skipping the Dry-Fit Stage – Always position the slabs before applying adhesive. This allows for last-minute adjustments that can prevent installation mishaps.


Conclusion

By following these steps, homeowners can achieve a flawless quartz countertop installation that enhances the beauty and functionality of their space. Proper preparation, precise execution, and routine maintenance ensure long-lasting performance and satisfaction with the final result. At Atlanta Stone Creations, we specialize in providing premium quartz countertops in Atlanta, Georgia, and surrounding areas in South Carolina and North Carolina. Whether you’re looking for a new kitchen design or a bathroom upgrade, our expert team is here to assist with high-quality materials and professional installation services.

How to Achieve A Marble Look With Quartz Countertops

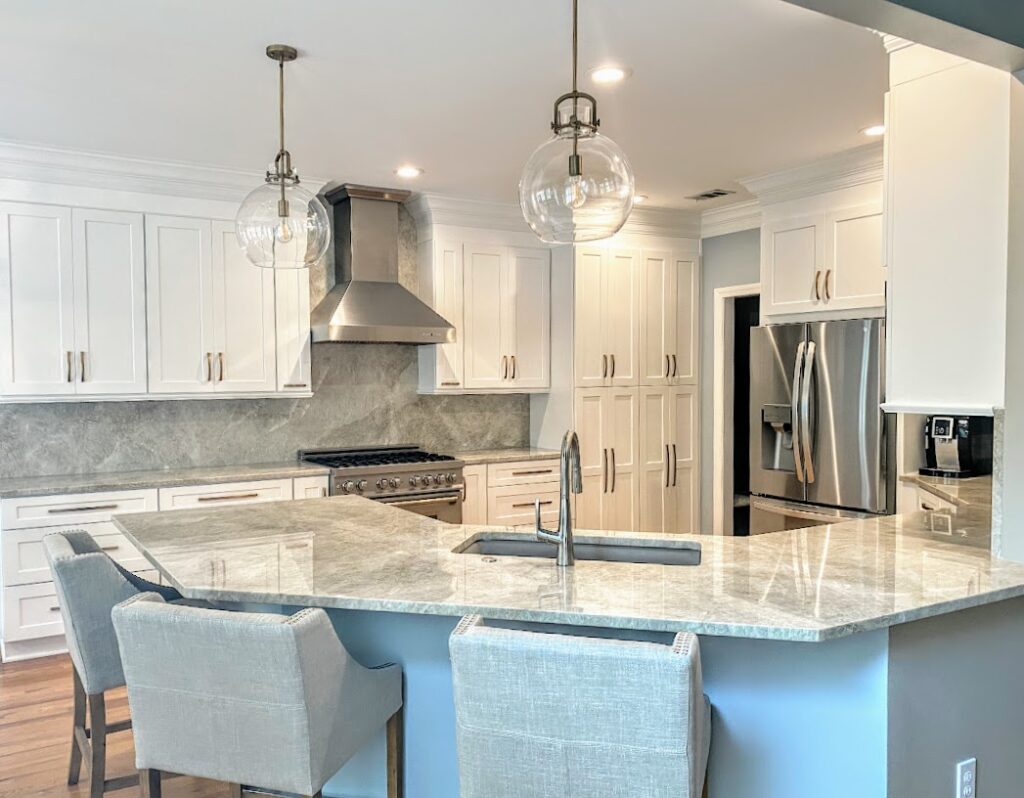
Spacious Kitchen with White Cabinets, Quartzite Counters & Blue Island

How to Achieve A Marble Look With Quartz Countertops

Spacious Kitchen with White Cabinets, Quartzite Counters & Blue Island

Marble countertops have long been admired for their beauty, but they come with maintenance challenges that may not suit every homeowner. Fortunately, quartz offers an elegant alternative that captures the aesthetic appeal of marble without its inherent drawbacks. This guide explores achieving a luxurious marble-inspired look using quartz countertops, helping homeowners make informed design choices.


Why Choose Quartz Over Marble?

The decision between marble and quartz often comes down to practicality. While marble is a natural stone known for its striking veining and timeless elegance, it is porous and susceptible to staining, etching, and chipping. Quartz, on the other hand, is an engineered stone made from natural minerals and resins. This composition results in a non-porous, highly durable surface that resists stains and scratches while mimicking the elegance of marble.

Quartz is also more budget-friendly in the long run. The initial cost may be comparable to mid-range marble, but with its low maintenance requirements, quartz eliminates the need for periodic sealing and intensive cleaning. For busy households, quartz’s practicality far outweighs marble’s upkeep.


Selecting the Right Quartz Design

Choosing the right quartz slab is crucial to achieving a marble-like effect. Several quartz varieties are designed to replicate the veining and coloration of classic marbles such as Cambria. These options offer soft white backgrounds with delicate or bold veining, closely resembling natural marble but with added durability. Homeowners looking for a more subtle appearance can opt for quartz with light gray veining, while those wanting a dramatic effect may select quartz with striking gold or charcoal veins.


Key Features of Marble-Like Quartz

  • Veining Patterns: Modern quartz manufacturing techniques create realistic veining patterns that mimic natural marble.
  • Color Variations: From crisp white to soft gray, quartz slabs offer a range of shades that complement any kitchen or bathroom design.
  • Finish Options: Choose between polished and matte finishes to match your preferred aesthetic.
  • Edge Profiles: Custom edge designs enhance the resemblance to marble, offering options such as beveled, ogee, or waterfall edges.
  • Consistency: Quartz has controlled patterns unlike natural stone, reducing unwanted color variations and inconsistencies.


Installation Tips for a Seamless Look

Achieving a high-end marble appearance with quartz requires careful installation. To enhance the natural look, opt for larger slabs with minimal seams. Seam placement should be planned strategically to align with the quartz’s veining pattern, ensuring continuity. Using the same quartz slab for backsplashes can create a cohesive and luxurious feel. Additionally, proper lighting can accentuate the veining and add depth to the overall design.


Key Installation Considerations

  1. Choose the Right Slab Size: Fewer seams lead to a more seamless and natural appearance.
  2. Align Veining Properly: Matching patterns across slabs enhances the illusion of natural stone.
  3. Use a Professional Installer: Precision cutting and installation ensure a flawless result.
  4. Consider a Waterfall Edge: This design extends the quartz down the sides of an island or countertop for an elegant touch.


Maintenance Advantages of Quartz

One key benefit of quartz over marble is its low-maintenance nature. Unlike marble, which requires frequent sealing and careful cleaning, quartz is non-porous and resists stains from common household items like coffee, wine, and oil. Simple cleaning with mild soap and water keeps quartz surfaces pristine. Additionally, quartz does not require sealing, making it a cost-effective and practical choice for busy kitchens and bathrooms.

To further protect the surface, avoid using harsh chemicals or abrasive cleaners or placing hot cookware directly on the countertop. While quartz is heat-resistant, prolonged exposure to high temperatures can cause discoloration.


Cost Considerations

While marble is often considered a luxury material, quartz offers a cost-effective alternative without compromising on elegance. The price of quartz countertops varies based on the installation’s brand, color, and complexity. On average, quartz is more affordable than high-end marble, with lower long-term maintenance costs. Homeowners can enjoy the beauty of marble-inspired designs without worrying about expensive upkeep or repairs.


Incorporating Quartz into Different Spaces

Quartz countertops with a marble effect are not limited to kitchens. They are a versatile option for various home applications, including:

  • Bathroom Vanities: Achieve a spa-like ambiance with Carrara-inspired quartz surfaces.
  • Fireplace Surrounds: Add sophistication with marble-look quartz around fireplaces.
  • Shower Walls: Create a seamless and modern aesthetic using large quartz slabs in showers.
  • Dining Tables: Extend the luxurious feel beyond countertops by incorporating quartz into furniture.
  • Office Desks: Elevate workspaces with durable and elegant quartz surfaces.


Common Misconceptions About Quartz and Marble

  1. Quartz Cannot Look Like Marble – With modern manufacturing, quartz closely mimics natural marble, making it nearly indistinguishable from the untrained eye.
  2. Quartz Is Less Durable—Quartz is more durable than marble and is resistant to scratches, stains, and daily wear.
  3. Marble Is Always More Expensive – While premium marble can be pricier, high-end quartz can also come at a premium cost, depending on the brand and design.
  4. Quartz Requires Sealing – Unlike natural stone, quartz is non-porous and does not need sealing.


Final Thoughts

For homeowners seeking the beauty of marble without its maintenance challenges, quartz is an excellent solution. At Atlanta Stone Creations, we offer premium quartz countertops that replicate the elegance of natural stone while providing unmatched durability. Serving Atlanta, Georgia, and surrounding areas in South Carolina and North Carolina, we help customers find the perfect quartz slabs to elevate their interiors. Contact us today to explore our marble-look quartz collection and bring timeless sophistication to your home.

Explore the Different Types of Quartz Countertops

Quartz. -OHMI - Bernini

Explore the Different Types of Quartz Countertops

Quartz. -OHMI - Bernini

Quartz countertops have become a staple in modern kitchen and bathroom designs due to their durability, versatility, and aesthetic appeal. With a wide range of colors, patterns, and finishes available, homeowners and designers can find the perfect quartz countertop to complement any space. This guide explores the different types and styles of quartz countertops, helping you make an informed choice for your next home improvement project.


Understanding Quartz Countertops

Quartz countertops are engineered stone surfaces composed of crushed natural quartz and resin binders. Unlike natural stone options such as granite or marble, quartz countertops are non-porous, making them highly resistant to stains, scratches, and moisture. This characteristic makes them a popular choice for kitchens and bathrooms where durability and easy maintenance are essential.


Different Types and Styles of Quartz Countertops

1. Polished Quartz Countertops

A polished quartz countertop offers a glossy, reflective surface that enhances the material’s color and veining. This finish is popular in contemporary and modern designs, providing a sleek and sophisticated look. Polished quartz is also easy to clean and requires minimal maintenance.

2. Matte or Honed Quartz Countertops

Honed quartz is an excellent option for homeowners looking for a softer, more natural look. This finish has a muted, matte appearance that works well in rustic, industrial, and minimalist spaces. Although it does not reflect light like polished surfaces, honed quartz provides a sophisticated and elegant aesthetic.

3. Textured Quartz Countertops

Textured quartz surfaces offer a unique tactile experience with finishes such as leathered or sandblasted effects. These countertops add depth and character to a kitchen or bathroom while maintaining the durability of traditional quartz. They are ideal for homeowners looking for a distinctive design statement.


Best Grades and Brands of Quartz Countertops

Quartz countertops are available in different grades, which affect the overall quality, durability, and price of the material. The three main categories include:

  • First Choice (Premium Grade): High-quality quartz with consistent patterns, rich colors, and minimal imperfections. These slabs are typically used in high-end kitchen remodels and luxury projects.
  • Commercial Grade: Slightly lower in quality but still offers durability and style. These quartz slabs may have minor imperfections that do not impact their functionality.
  • Builder’s Grade: The most affordable option, often used in large-scale construction projects. These slabs may have more inconsistencies and a thinner composition.

Top quartz brands include Cambria, Silestone, and MSI, known for their durability, extensive design selections, and high-quality manufacturing processes.


Popular Quartz Colors and Patterns

The color and pattern of quartz countertops significantly impact the overall aesthetic of a kitchen or bathroom. Some of the most sought-after colors include:

  • White Quartz: Classic and timeless, white quartz countertops like Cambria or Calacatta-inspired designs offer a clean and elegant look.
  • Gray Quartz: Neutral and versatile, gray quartz pairs well with various cabinetry and decor styles.
  • Black Quartz: A bold and dramatic choice, black quartz countertops create a striking contrast in modern kitchens.
  • Marble-Look Quartz: Mimicking the natural veining of marble, these quartz slabs provide luxury without high maintenance.
  • Speckled or Flecked Quartz: Ideal for those who prefer a more natural, stone-like appearance with subtle color variations.


Quartz Countertop Thickness Options

Quartz countertops come in different thicknesses, which impact their durability and aesthetic appeal:

  • 1 cm (10mm): Thin and lightweight, typically used in commercial applications or as vertical surfaces.
  • 2 cm (20mm): The standard thickness for quartz countertops, balancing durability and cost-effectiveness.
  • 3 cm (30mm): The thickest and most durable option, ideal for luxury kitchen designs and heavily used spaces.


Quartz Countertop Maintenance and Durability

One of the key benefits of quartz countertops is their low-maintenance nature. Unlike natural stone surfaces that require regular sealing, quartz is non-porous and easy to clean with mild soap and water. It resists staining, making it ideal for busy kitchens and bathrooms.

Quartz is also highly durable and resistant to scratches and heat, though cutting boards and trivets are recommended to prolong its lifespan. With proper care, quartz countertops can last for decades, maintaining their beauty and functionality.


Choosing the Right Quartz Countertop for Your Home

When selecting a quartz countertop, consider factors such as:

  • Design Style: Choose a color and finish that complements your kitchen or bathroom decor.
  • Usage: High-traffic areas may benefit from thicker slabs and more durable finishes.
  • Budget: Explore different brands and grades to find a balance between quality and affordability.
  • Maintenance Needs: Choose polished surfaces for easy cleaning or honed finishes for a softer look.


Final Thoughts

Quartz countertops offer a perfect combination of beauty, durability, and ease of maintenance. Whether you prefer a polished, honed, or textured finish, there is a quartz style to match every design preference. At Atlanta Stone Creations, we provide a wide range of premium quartz countertops, serving Atlanta, Georgia, and surrounding areas in South Carolina and North Carolina. Contact us today to explore our collection and find the perfect quartz surface for your home.


Matte vs Sparkle Quartz Countertops: Which one to Choose?

Quartz - JJ GRanite - Carrara Select

Matte vs Sparkle Quartz Countertops: Which one to Choose?

Quartz - Cambria - NewPort

One of the most important decisions homeowners face when selecting quartz countertops is choosing between a matte finish and a sparkle finish. Each option offers a unique look and functionality, influencing your kitchen or bathroom’s overall aesthetics and practicality. This guide explores the characteristics of both finishes, helping you decide which best suits your home’s design and lifestyle needs.


Understanding Quartz Countertops and Their Finishes

Quartz countertops are engineered stone surfaces made from natural quartz combined with resins and pigments. They are known for their durability, low maintenance, and versatility in design. The finish applied to the quartz slab plays a crucial role in its appearance, texture, and performance.


Matte Quartz Countertops: A Contemporary Choice

A matte quartz countertop offers a soft, velvety surface with minimal reflection. Unlike polished quartz, matte finishes absorb light, creating a subtle and sophisticated look.

Key Characteristics:
  • Understated Elegance: The soft sheen gives countertops a refined and modern aesthetic, complementing contemporary and minimalist kitchens.
  • Low Reflectivity: Ideal for spaces with bright lighting or large windows, as the surface minimizes glare.
  • Smooth Texture: The lack of gloss creates a tactile appeal, making matte quartz comfortable to touch.
  • Hides Imperfections: Matte surfaces effectively conceal smudges, fingerprints, and water spots.
  • Scratch and Stain Resistance: Although durable, matte quartz requires regular cleaning to preventthe buildup of residues.
Best Design Matches:
  • Industrial-style kitchens with concrete or slate accents.
  • Rustic kitchens with natural wood cabinets and earthy tones.
  • Sleek modern interiors featuring neutral palettes and minimalist designs.


Sparkle Quartz Countertops: A Bold Statement

A sparkle quartz countertop features a polished finish with embedded reflective particles that catch and scatter light, creating a dazzling effect. This finish is perfect for those who love a glamorous and eye-catching kitchen or bathroom surface.

Key Characteristics:
  • High Gloss & Shine: Provides a sleek, mirror-like surface that enhances brightness in a room.
  • Luxurious Aesthetic: Adds a sophisticated sparkle that elevates any space.
  • Easy to Clean: The smooth surface allows spills and debris to be wiped away effortlessly.
  • More Pronounced Veining: Polishing enhances the depth and movement of veining patterns in quartz slabs.
  • Reflects Light: Ideal for smaller kitchens or bathrooms, as it creates the illusion of a larger space.
Best Design Matches:
  • Contemporary kitchens with high-gloss cabinets and stainless steel fixtures.
  • Glamorous interiors featuring brass or gold accents.
  • Open-concept kitchens that benefit from additional light reflection.


Comparing Durability and Maintenance

Both matte and sparkle quartz countertops are durable and resistant to scratches, stains, and heat. However, maintenance requirements vary slightly.

Feature

Matte Quartz

Sparkle Quartz

Appearance

Soft, velvety finish

Glossy, reflective finish

Glare Reduction

High

Low

Hides Smudges

Yes

No

Cleaning Ease

Requires more frequent wiping

Easy to clean with mild soap

Scratch Visibility

Less noticeable

More noticeable

Water Spot Visibility

Less visible

More visible


Choosing the Right Quartz Finish for Your Space

The choice between matte and sparkle quartz depends on personal preference, usage habits, and design aesthetics.

Opt for Matte Quartz If:

  • You prefer a subtle, understated look that blends seamlessly with modern and rustic designs.
  • Your kitchen or bathroom has ample natural light, reducing the need for additional reflective surfaces.
  • You want a countertop that hides fingerprints, smudges, and water spots.
  • You like a soft texture that adds warmth and depth to the space.

Opt for Sparkle Quartz If:

  • You love the luxurious, high-end look that polished countertops provide.
  • Your kitchen or bathroom is smaller, and you want a surface that reflects light to make the space feel larger.
  • You prefer countertops that are easy to clean with minimal effort.
  • You enjoy bold, eye-catching surfaces that become the room’s focal point.


Impact of Lighting on Quartz Countertops

Lighting plays a significant role in how each quartz finish appears.

  • Matte countertops absorb light, making them ideal for bright rooms with excessive glare.
  • Sparkle quartz countertops reflect light, brightening up darker spaces and adding a dynamic effect.


Final Thoughts

Both matte and sparkle quartz countertops offer distinct advantages, making them excellent choices for different kitchen and bathroom styles. At Atlanta Stone Creations, we provide high-quality quartz countertops tailored to your design vision. Whether you prefer a soft, modern matte finish or a dazzling sparkle effect, our experts can help you find the perfect quartz surface for your home. Contact us today to explore our collection and bring your dream kitchen or bathroom to life!


How to Clean Quartz Countertops: Do’s and Don’ts

Modern Kitchen with White Cabinets, Quartzite Counters & Stainless Steel Appliances

How to Clean Quartz Countertops: Do’s and Don’ts

Modern Kitchen with White Cabinets, Quartzite Counters & Stainless Steel Appliances

Keeping your quartz countertops clean is essential to maintaining their beauty and longevity. While quartz is durable and resistant to stains, improper cleaning can dull its shine or cause damage over time. This guide outlines the best practices for cleaning quartz countertops, including common mistakes to avoid.


Why Proper Cleaning Matters

Quartz countertops are engineered to be non-porous and highly resistant to stains, making them ideal for busy kitchens and bathrooms. However, using the wrong cleaning products or techniques can degrade the surface over time. By following the proper care methods, you can ensure your quartz countertops remain pristine for years.


Do’s: Best Practices for Cleaning Quartz Countertops

1. Wipe Up Spills Immediately

Even though quartz is resistant to stains, spills should be cleaned quickly to prevent residue buildup. Use a soft cloth or paper towel to wipe away liquids like coffee, wine, and juice before they dry.

2. Use a Mild Dish Soap and Warm Water

Mix mild dish soap with warm water for daily cleaning and apply it with a soft sponge or cloth. This solution effectively removes everyday dirt and grease without harming the countertop surface.

3. Choose Non-Abrasive Cleaning Tools

Always use a microfiber cloth, soft sponge, or non-abrasive scrub pad to avoid scratching the surface. Harsh scrubbing pads can cause minor abrasions that dull the quartz’s polished finish.

4. Disinfect with a Gentle Solution

To kill germs and bacteria, use a diluted mixture of rubbing alcohol and water. Spray lightly on the surface and wipe with a soft cloth. This method keeps your countertops sanitized without damaging the finish.

5. Use a Plastic Scraper for Stubborn Residue

If food or sticky residue has dried onto the surface, gently scrape it off with a plastic putty knife or credit card. Avoid using metal tools, as they may scratch the quartz.


Don’ts: Common Mistakes to Avoid

1. Avoid Using Harsh Chemicals

Strong cleaning agents, such as bleach, ammonia, and oven cleaners, can break down the quartz resin and cause discoloration. Stick to pH-balanced or neutral cleaners designed for stone surfaces.

2. Don’t Use Abrasive Cleaners

Stay away from abrasive powders, scouring pads, or steel wool. These products can leave micro-scratches on the quartz surface, dulling its natural shine over time.

3. Never Place Hot Pots Directly on Quartz

Quartz is heat resistant but not heatproof. Placing hot pots, pans, or baking sheets on the surface can lead to discoloration or thermal shock. Always use trivets or heat-resistant pads to protect your countertops.

4. Avoid Cutting Directly on the Countertop

While quartz is scratch-resistant, sharp knives can leave marks over time. Always use a cutting board when preparing food to keep your countertops in top condition.

5. Don’t Let Liquids Sit for Too Long

Although quartz resists staining, prolonged exposure to acidic liquids like citrus juices, vinegar, and wine can cause discoloration. Wipe up spills promptly to prevent long-term damage.


How to Remove Stains from Quartz Countertops

If you encounter a stubborn stain, follow these steps to remove it safely:

  1. Water and Baking Soda Paste – Mix baking soda with a small amount of water to create a paste. Apply it to the stain, let it sit for 10 minutes, and wipe it away with a damp cloth.
  2. Isopropyl Alcohol Solution—For grease or oil stains, mix equal parts of isopropyl alcohol and water. Apply the solution to the stain and wipe it clean with a soft cloth.
  3. Glass Cleaner for Tough Spots – A mild, ammonia-free glass cleaner can help remove stuck-on grime or streaks. Spray lightly and wipe down with a microfiber cloth.


Maintaining the Shine of Quartz Countertops

  • Polishing: Unlike natural stone, quartz does not require sealing or polishing. However, using a stone-safe polish occasionally can enhance the luster.
  • Daily Maintenance: Wipe the surface regularly to prevent dust buildup and maintain a streak-free finish.
  • Long-Term Care: Avoid prolonged exposure to direct sunlight, as UV rays can fade quartz over time.


Final Thoughts

Properly maintaining your quartz countertops ensures they stay beautiful and durable for years. Follow these do’s and don’ts to keep your surfaces spotless and extend their lifespan. At Atlanta Stone Creations, we provide expert guidance and top-quality quartz countertops for kitchens and bathrooms. Contact us today for more tips on quartz care or to explore our stunning countertop collections!


Can You Put Hot Pans on Quartz Countertops? Heat Resistance Explained

Black and White quartz Kitchen Countertop with Rose Gold Faucet

Can You Put Hot Pans on Quartz Countertops? Heat Resistance Explained

Quartz countertops have become a staple in modern kitchens due to their durability, aesthetic appeal, and low maintenance. However, many homeowners wonder if quartz can withstand heat from hot pots and pans. While quartz is highly durable, it is not entirely heatproof.


What Happens When You Place Hot Pans on Quartz?

Quartz countertops are engineered stone surfaces composed of natural quartz minerals and polymer resins. While quartz is heat-resistant, the resins used in manufacturing are not. The resin can discolor, scorch, or even crack when exposed to high temperatures. Placing hot pans directly on the surface can lead to irreversible damage, including discoloration, burn marks, or warping.


How Does Quartz Compare to Other Countertop Materials?

Material

Heat Resistance

Quartz

Moderate

Granite

High

Marble

Moderate

Quartzite

High

Laminate

Low

Solid Surface

Low

While quartz is more heat-resistant than laminate, it does not offer the same level of protection as granite or quartzite. This means you must take precautions when dealing with hot cookware.


Best Practices for Protecting Quartz Countertops

1. Always Use Trivets or Hot Pads

Placing a hot pad or trivet under pots, pans, or baking trays prevents direct contact with the quartz surface. This simple step can help prevent costly damage.

2. Avoid Direct Contact with High Heat

Items such as slow cookers, air fryers, or toaster ovens should be placed on heat-resistant mats instead of directly on quartz counters. Extended exposure to heat can weaken the resin and cause damage.

3. Clean Up Spills Promptly

Even though quartz is stain-resistant, spills from hot food or liquids should be wiped away immediately to avoid any potential discoloration.

4. Avoid Sudden Temperature Changes

Thermal shock can occur when hot items are placed directly on a cold quartz surface. This can cause cracks or fractures in extreme cases.


Common Misconceptions About Quartz Heat Resistance

1. “Quartz Is Indestructible”

Quartz is durable but not indestructible. High heat exposure weakens its structural integrity over time.

2. “You Can Use Quartz the Same Way as Granite”

Unlike natural stone surfaces like granite or quartzite, quartz contains resins that are susceptible to heat damage. While quartz is an excellent alternative to granite, it requires slightly more care.

3. “Quartz Countertops Are Completely Heatproof”

While quartz can withstand some heat, it is not heatproof. Continuous or extreme exposure to heat can cause permanent damage.


What to Do If Your Quartz Countertop Gets Damaged by Heat

If your quartz countertop has been affected by heat, here are a few steps to mitigate the damage:

  • For mild discoloration: Try using a mild cleaner or baking soda and water paste to scrub the affected area gently.
  • For minor scorch marks: Use a quartz polishing compound to remove the damage.
  • For deep cracks or burns: Contact a professional fabricator or countertop repair specialist.


Final Thoughts

Quartz countertops offer a combination of style, durability, and ease of maintenance. However, they are not invincible when it comes to heat. Always use trivets or hot pads to protect your investment, avoid sudden temperature changes, and clean up spills immediately. At Atlanta Stone Creations, we offer high-quality quartz countertops with expert advice on care and maintenance. Contact us today to explore our wide selection of quartz surfaces!


Creative Ways to Pair Quartz Countertops with Backsplashes

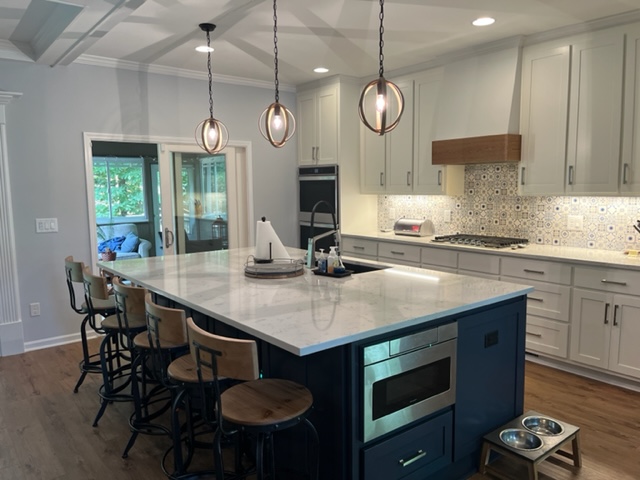
Modern Kitchen with Gray Cabinets, Quartz Countertops, Navy Island, Pendant Lights & Patterned Tile

Creative Ways to Pair Quartz Countertops with Backsplashes

Modern Kitchen with Gray Cabinets, Quartz Countertops, Navy Island, Pendant Lights & Patterned Tile

Choosing the right backsplash to complement your quartz countertop can elevate the design of your kitchen or bathroom. With various materials, colors, and patterns available, homeowners have countless ways to create a visually stunning and cohesive space. Whether aiming for a bold statement or a subtle, elegant look, these creative ideas for pairing quartz countertops with backsplashes will help inspire your next design project.


1. Match the Quartz Countertop with a Full-Height Quartz Backsplash

A full-height quartz backsplash is a luxurious way to create a seamless look in your kitchen. Using the same quartz material for the countertop and backsplash eliminates grout lines, making the space appear larger and more cohesive. This method works exceptionally well in modern and minimalist kitchens where clean lines and a continuous flow of materials enhance the aesthetic appeal.


2. Contrast Dark Quartz Countertops with a Light Backsplash

If you have dark quartz countertops in shades like deep gray, black, or navy, consider pairing them with a light-colored backsplash such as white subway tiles, marble-look porcelain, or a soft beige tone. This contrast creates a balanced and elegant design that allows the countertops to stand out while keeping the overall look fresh and inviting.


3. Pair White Quartz with Bold, Patterned Backsplashes

White quartz countertops provide a neutral foundation for bold and creative backsplash designs. Some stylish options include:

  • Moroccan-inspired tiles with intricate patterns
  • Geometric mosaic tiles in blue, green, or gold
  • Colorful ceramic tiles add warmth and vibrancy This approach adds personality and charm to your kitchen while maintaining the timeless beauty of white quartz.


4. Use Textured or Dimensional Tiles for Depth

A textured or three-dimensional backsplash can introduce depth and interest to a quartz countertop. Consider:

  • Stacked stone for a rustic feel
  • Herringbone or chevron tile layouts for a dynamic touch
  • Glass or metallic finishes reflect light and add modern elegance. Pairing smooth quartz countertops with textured backsplashes creates an engaging contrast that enhances the overall aesthetic.


5. Incorporate a Subway Tile Backsplash for a Classic Look

Subway tiles remain a timeless choice for pairing with quartz countertops. Available in various sizes, finishes, and materials, subway tiles can be arranged in creative layouts such as:

  • Traditional brick pattern
  • Herringbone pattern for added movement
  • Vertical stacking for a contemporary feel Pairing quartz countertops with subway tiles ensures a versatile, classic kitchen design that never goes out of style.


6. Opt for a Waterfall Edge and a Matching Slab Backsplash

Extend the quartz countertop into a waterfall edge for a sleek, modern look, and match it with a full-slab backsplash. This method is ideal for contemporary kitchens where high-end finishes and seamless integration take center stage. The continuous veining from the countertop to the backsplash enhances the elegance of the space.


7. Experiment with Metallic Accents for a Luxurious Feel

Metallic backsplashes, such as brushed gold, stainless steel, or bronze tiles, add a luxurious touch to quartz countertops. These finishes complement white quartz and darker shades, providing a sophisticated contrast. Metallic accents work particularly well in industrial, contemporary, or glam-inspired kitchens.


8. Blend Neutral Quartz Countertops with Warm, Earthy Backsplashes

Neutral quartz countertops, such as taupe, beige, or soft gray, pair beautifully with warm and earthy backsplash materials. Consider options like:

  • Terracotta tiles for a Mediterranean vibe
  • Wood-look porcelain tiles for a cozy, organic feel
  • Natural stone mosaics add texture and richness This combination creates an inviting and well-balanced kitchen atmosphere.


9. Add a Pop of Color with a Glass Tile Backsplash

Glass tile backsplashes are a stylish way to add color and brightness to a quartz countertop. Available in a variety of shades, from aqua blues and emerald greens to deep plums and fiery reds, glass tiles can reflect light and create a lively, modern kitchen design. When paired with a neutral quartz surface, a colorful glass backsplash becomes the room’s focal point.


10. Consider a Matte vs. Glossy Finish Combination

Mixing matte quartz countertops with a glossy backsplash (or vice versa) adds an element of contrast and sophistication. A matte quartz countertop paired with a glossy ceramic or glass tile backsplash enhances depth and shine. On the other hand, a polished quartz countertop matched with a matte-finish backsplash offers a soft, understated elegance.


11. Pair Veined Quartz with a Solid-Color Backsplash

Quartz countertops with dramatic veining (resembling marble) look stunning when paired with a solid-colored backsplash. A simple white, gray, or black tile backsplash allows the veining to take center stage, creating a sophisticated and balanced design without overwhelming the space.


12. Mix and Match Materials for a Custom Look

For those who love a unique and customized approach, mixing different backsplash materials can create a one-of-a-kind design. Consider blending:

  • Quartz slab with mosaic tiles for a blend of elegance and texture
  • Porcelain tile with metal accents adds a dynamic visual effect
  • Marble-look quartz countertops with contrasting wood or brick backsplashes By combining different materials, homeowners can create a tailored space that reflects their style.


Final Thoughts

Pairing quartz countertops with the perfect backsplash can completely transform the look of a kitchen or bathroom. Whether opting for a seamless quartz backsplash, a bold patterned tile, or a classic subway tile design, the right combination enhances the space’s overall aesthetic and functionality. At Atlanta Stone Creations, we offer high-quality quartz countertops and expert guidance to help homeowners create their dream kitchen or bathroom. Contact us today to explore our collection and discover the perfect countertop and backsplash pairings for your home!